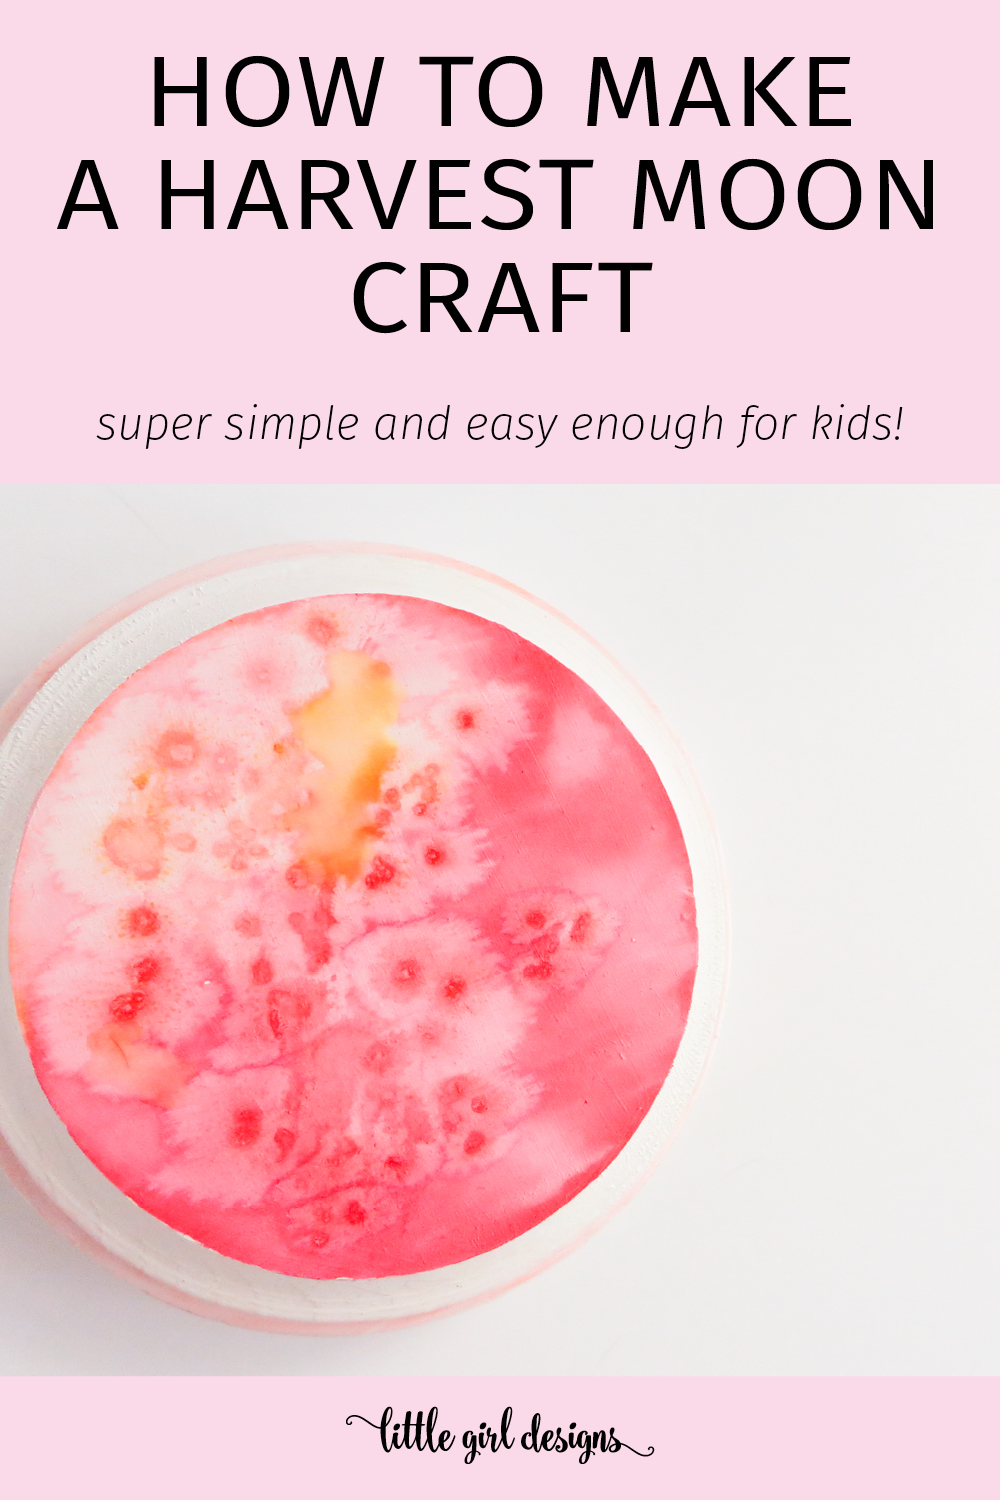
Want to learn how to make a harvest moon? This craft is beautiful and so simple to make you can even invite the kids to try it out. Last summer I discovered the wonderful world of water soluble markers. Up until then, I had been using markers like I thought they were supposed to be used—to color paper with bright pops of color. Okay, who am I kidding? I really like writing in my journal/art journal with them! Anyway, it had never occurred to me that adding a bit of water to these could instantly create a watercolor-like look that was completely beautiful.
After that initial discovery, I began experimenting with different surfaces. I happened to have a plain wooden circle on hand and decided to use it for this craft. Now, to be honest, when I started playing that day, I wasn’t on a mission to make a harvest moon, but that’s what ended up happening. You might find as you’re playing that you’re rather make variegated stripes or something else. If so, go for it!
How to Make a Harvest Moon
You will need:
One small wooden circle (does not need to be finished/sanded)
White gesso
Paintbrush
Water soluble markers (I used Crayola)
Water
Salt (optional)
To start, I painted the entire circle with gesso, and let it dry. (I should mention that the circle of wood I used is small—about 4 inches across.) As it was drying, I chose two markers that I thought would look nice together. You can take a minute to scribble on mixed media paper and then paint water over the marks to see which colors you like best too. Remember to keep warm colors (red/orange) away from cool colors (blue/green); this will keep your harvest moon from appearing muddy.
Once the gesso is dry, use the side of the marker to color a section of the surface. I used a pink marker to color the majority of it. Then color a smaller section with a secondary color.
Now for the fun part. Dip your paintbrush into water, and paint the marks. It’s kind of mesmerizing to watch the colors swirl and pool on the surface. You can also sprinkle a bit of salt to the surface to add another dimension of texture. Simply wipe the salt off once the paint dries.
In the image below, you can see that I also added a pink border with the marker.

Super simple, right?
Hope you have a lovely {and creative} day!