
Who doesn’t love a pop-up card? It’s mail with a sweet surprise all wrapped up in one. Maybe you’ve wanted to try to make one before but the thought of spending quality time constructing such a piece has left you disheartened. Or maybe that’s just me. You see 90% of my crafting/writing/painting/everything-creativity time is during my daughter’s nap so there’s a lot to squoosh into that little tiny space. I don’t have time to illustrate 200 balloons and carefully glue them together into an amazing pop-up card. This is probably just an excuse but I’m going with it for now.
Many pop-up cards use a technique where you essentially make several different ‘columns’ per se in the card to affix your illustration or pop-up piece to. I tried this method and learned it is the way to go if you’re into measuring and making sure everything is even. If all you want is a simple pop-up card that you can make and then dance around the room with because it’s so fun, then this is the tutorial for you.
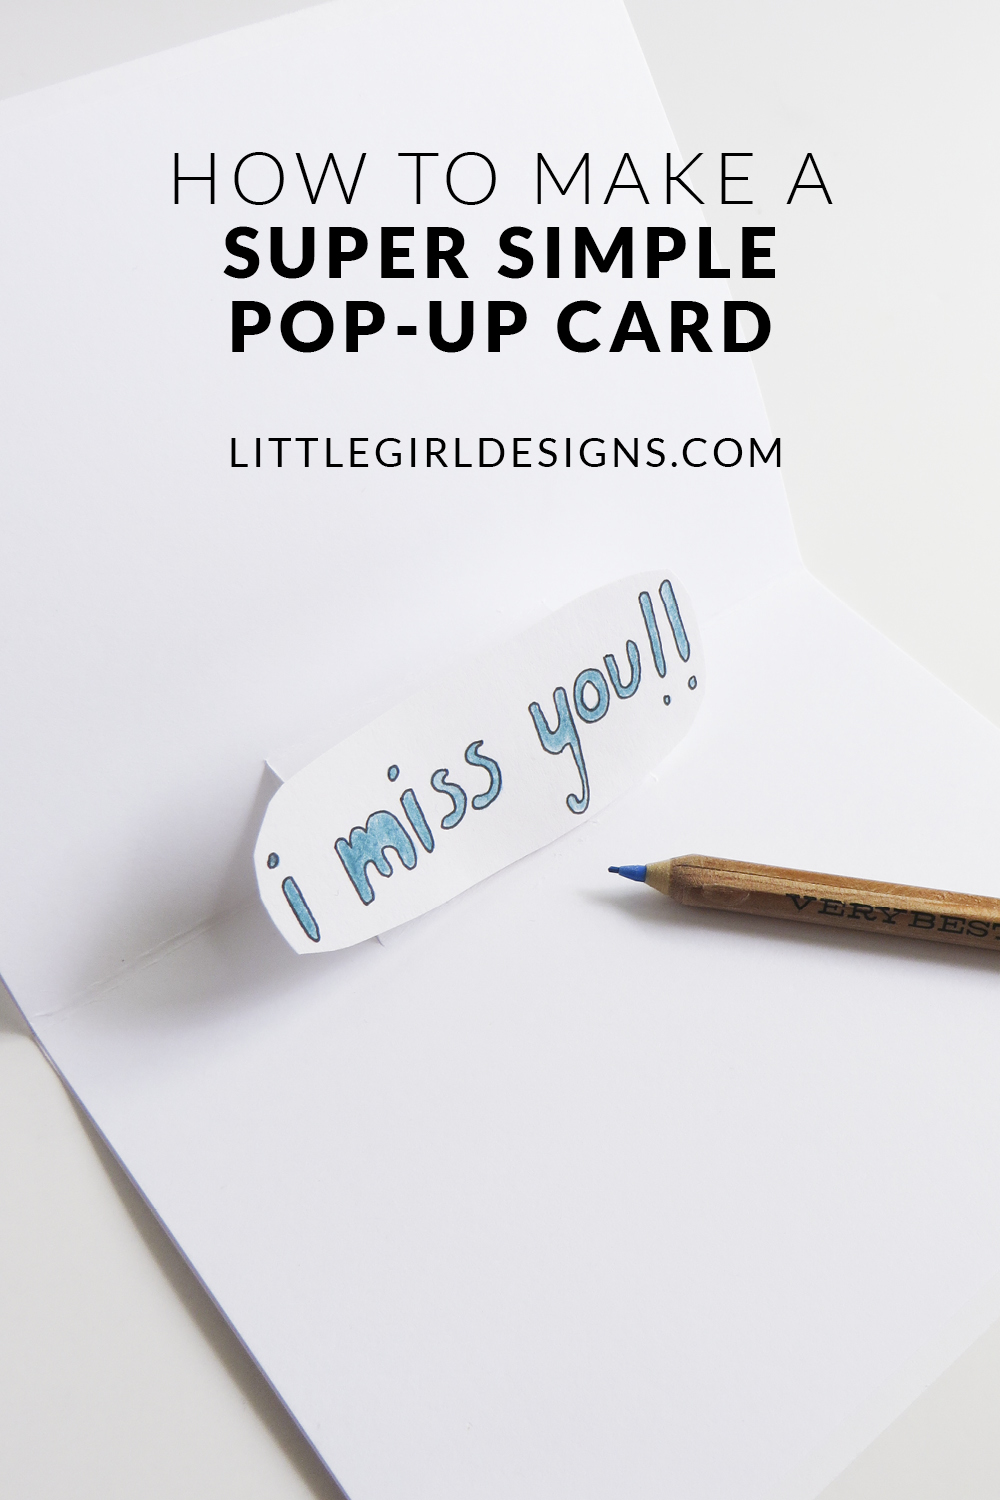
How to Make a Super Simple Pop-up Card
You’ll need:
Two blank cards
Matching piece of card stock (I used all white paper for this tutorial; you can mix it up.)
Scissors
Pencil
Razor blade to cut the paper
Gel pen(s)
Glue
Glue Dots or double-stick tape
First, brainstorm a couple of ideas for what you want to make inside of your card. You can write a word, make a smiley face, or draw a cat. Draw this on the matching piece of card stock. I drew “I miss you!” with a gel pen and then filled it in with a watercolor pencil. Cut this illustration out. Make sure that it isn’t so big that it will stick out of the card when the card is folded.
Place one of the cards on a surface where you can cut. Use the pencil to place a dot approximately one third of the way in on either side of the card. Depending on what you drew, you might need a larger “step” to attach your illustration to (or even a smaller one.) Use the razor blade to cut the card as shown below.

Carefully push the cut pieces out so that they form a little bench of sorts. This is where you’ll attach your illustration. Isn’t it cute?

You can initially put a piece of double-stick tape on the back of the illustration in order to position it correctly. I found my phrase needed to float just slightly above the paper or else it would bend when I closed the card. Once you get the placement correct, you can leave it as is, or add a glue dot or two to keep it in place.

Now it’s time to put everything together. Close the pop-up card and place it inside another blank card. Glue it into this card so that the slits don’t show quite as much. You don’t have to do this step but if you don’t, know that the front of your card will have the tell-tale signs of a pop-up card. 🙂
Have you ever made a pop-up card? What did you put inside?
2 responses to “How to Make a Super Simple Pop-up Card”
This is super cute! Who wouldn’t love getting a pop up card. Hope your having a great week.
Thanks so much, Theresa! 🙂